Unilateral tolerance
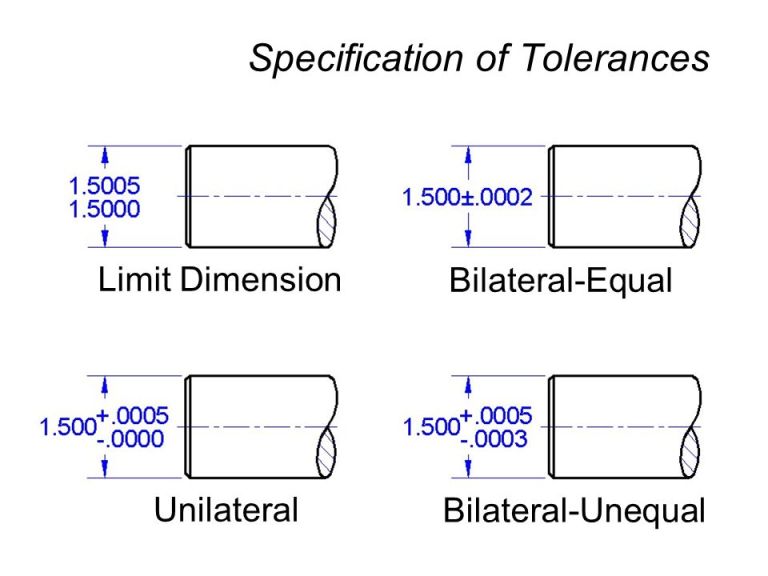
Unilateral Tolerance - A unilateral tolerance is a tolerance in which variation is permitted only in one direction from the specified dimension, example, 1.500 +. 005/ -. 000."
Hence when tolerance is given on one side of the basic dimension, it is called Unilateral tolerance.

Max. 50.025 mm ; Min. 50.002 mm
Upper Limit = Basic Size +ES = 50+0.025=50.025
Lower Limit = Basic Size + EI = 50+0.002 = 50.002
21 classes of fits and 16 grades of tolerances
British standard limit system consists of 21 classes of fits and 16 grades of tolerances.
25.00 mm
A dimension is stated as Dia 25 H7 in a drawing. The lower limit is 25.00 mm.
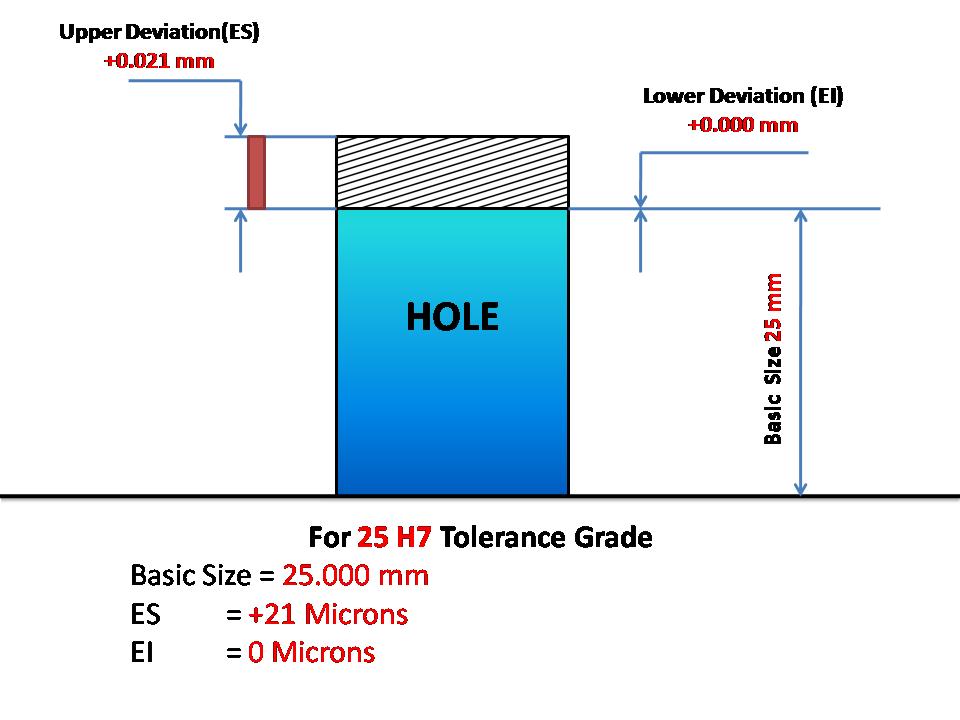
For 25 H7 Tolerance Grade
Basic Size = 25.000 mm
ES = +21 Microns = 0.021 mm
EI = 0 Microns = 0.000 mm
Hence
Lower limit = Basic Size + EI = 25.000 + 0.000 = 25.000 mm
Upper Limit = Basic Size + ES = 25.000 + 0.021 = 25.021 mm
Hence A dimension is stated as Dia 25 H7 in a drawing. The lower limit is 25.000 mm.

0.04 mm
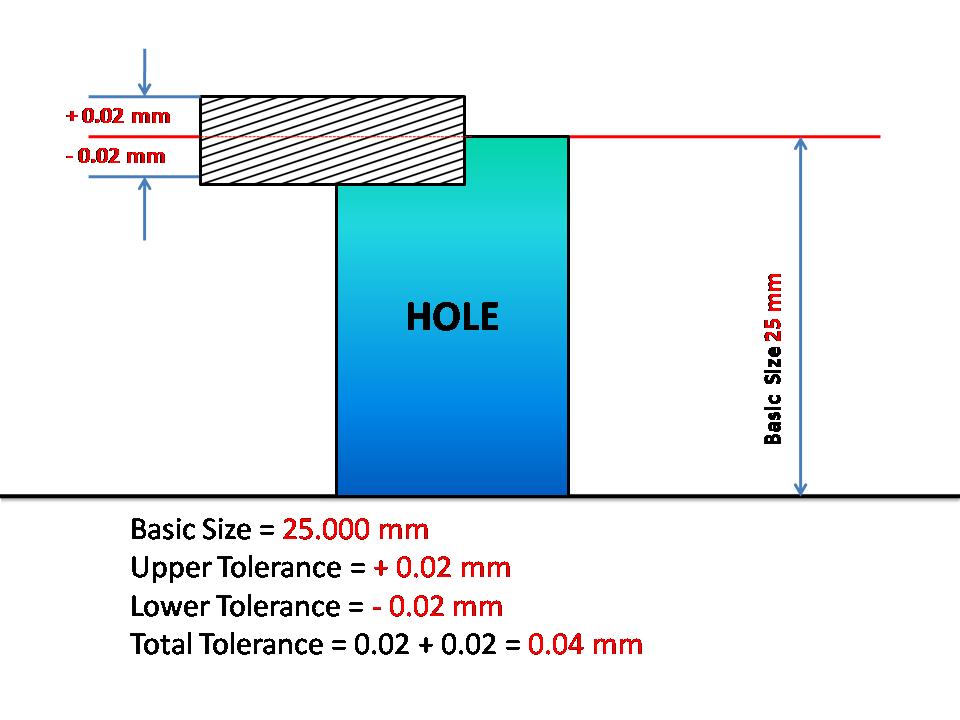
A dimension is stated as 25 +/-0.02 mm in a drawing. Then
Basic Size = 25.000 mm
Upper Tolerance = + 0.02 mm
Lower Tolerance = - 0.02 mm
Total Tolerance = 0.02 + 0.02 = 0.04 mm
